
As you make your way through the Tableau 201 series, and especially the Tips & Tricks section, there is one functionality that you will hear about over and over: parameters. Parameters are the solution to several of the handiest tricks in Tableau because of their flexibility. Other than filters, parameters are also one of the most powerful tactics in Tableau for transferring control from the author to the end user. As discussed in the Data-Driven Storytelling Tip: Allow Discovery, providing this type of user interaction not only improves the engagement with your dashboards, but it improves the retention of insights and improves the likelihood that they will be shared.
This post will use a simple algebra example to illustrate how to create a parameter, how to allow end users to control the parameter you’ve created, and how parameters work.
An Introduction to Parameters in Tableau
For this tutorial, imagine that you want to set up a simple algebraic equation for 2 multiplied by X, where X is the parameter, and the end user gets to choose the value of X. Tableau will then display the answer of 2 multiplied by X based on the parameter selection.
For this introduction, it does not matter what data set you are following along with, but for consistency with the rest of Tableau 201, we will be building a parameter in the Sample – Superstore data set. A new parameter can be created in Tableau by either (1) Clicking the down arrow in the top-right corner of the Dimensions Shelf and choosing “Create parameter…” or (2) Right-clicking in a blank space on the Dimensions, Measures, Sets, or Parameters Shelf and choosing “Create parameter…”. Once you have done this, you will be presented with a dialog box where you can design the parameter:
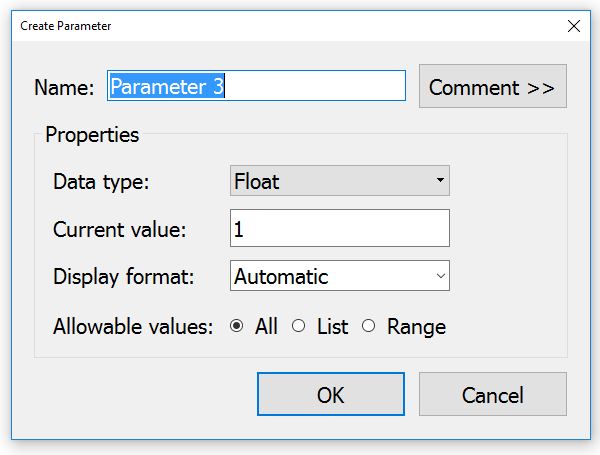
Instead of “Parameter 3”, named that by default in the Sample – Superstore data set because there are already two other parameters, we will change the name to “Algebra Parameter”. By default, the data type for a new parameter is float, which means any number including decimals, but there are five additional data types to choose from:
Integer: Any whole number (i.e. no decimals)
String: Text
Boolean: True or false
Date: Date without a timestamp
Date & Time: Date with a timestamp
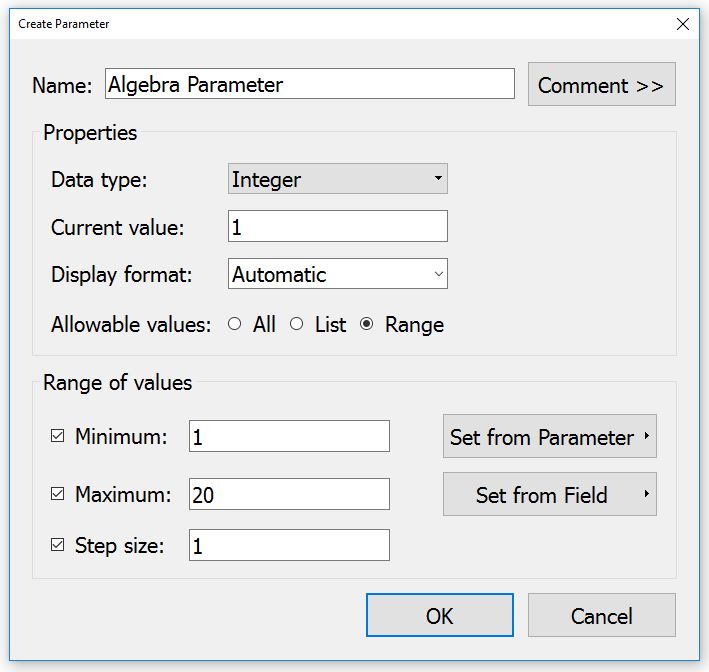
The data type you choose for the parameter depends on your use case. For this 2 multiplied by X example, let’s say that we eventually want the parameter to include only whole numbers, so we will change the data type from Float to Integer.
Within the parameter creation dialog box, you also have the ability to designate the allowable values for the parameter. The entries that you choose at this step will eventually determine what choices you and the end users have for the parameter in the final product. The choices are all or any integer, a specific list of integers, or a range of integers. we will choose range so that we can set a minimum and maximum number as well as a step size, or multiple, for the parameter. After setting up the parameter to have a range of 1 to 20 with a step size of 1, our parameter looks like this and is ready to be saved by clicking the “OK” button:
In order to use a parameter, you must provide Tableau instructions on how to use the parameter. This is accomplished through calculated fields. Being that the equation for our use case is 2 multiplied by X, or our algebra parameter, your first instinct may be to create a calculated field that says:
2*[Algebra Parameter]
Being that the current value of the parameter is 1, we would expect the answer to be 2*1 = 2. However, this calculation will be computed for every row in the data, which would not provide the answer we are looking for. Should we add this calculated field to the view, we would get an answer of 19,988, which is 2 multiplied by 1, multiplied by the number of records in the data set (9,994 for the Sample – Superstore data set).
To alleviate this, add an aggregation of MIN to the 2 so the Algebra Parameter is guaranteed to be multiplied by 2:
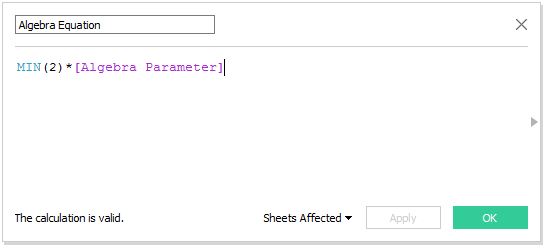
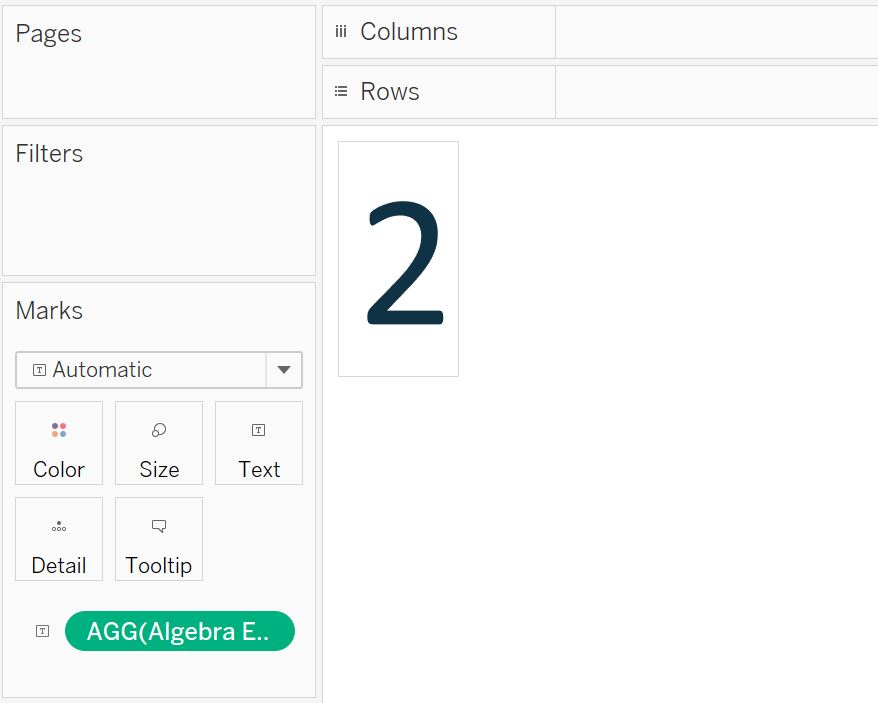
Now if we add the newly created Algebra Equation calculated field to the Text Marks Card to display the answer on a view, we see the answer we are looking for, MIN(2) multiplied by 1 equals 2:
Finally, to provide the power of selecting the value of X in our algebra example to the end user, you must provide access to the parameter. To do this, right-click on the newly created Algebra Parameter and choose “Show parameter control”. A new selector will appear in the top-right corner of the view that allows the user to choose from the allowable values that were set up when the parameter was created. Notice that the current value is 1, the maximum value is 20, and the numbers can be selected in multiples of 1, just like we set up. Here’s what our final view looks like when we’ve shown the parameter control and changed the selection from 1 to 7:
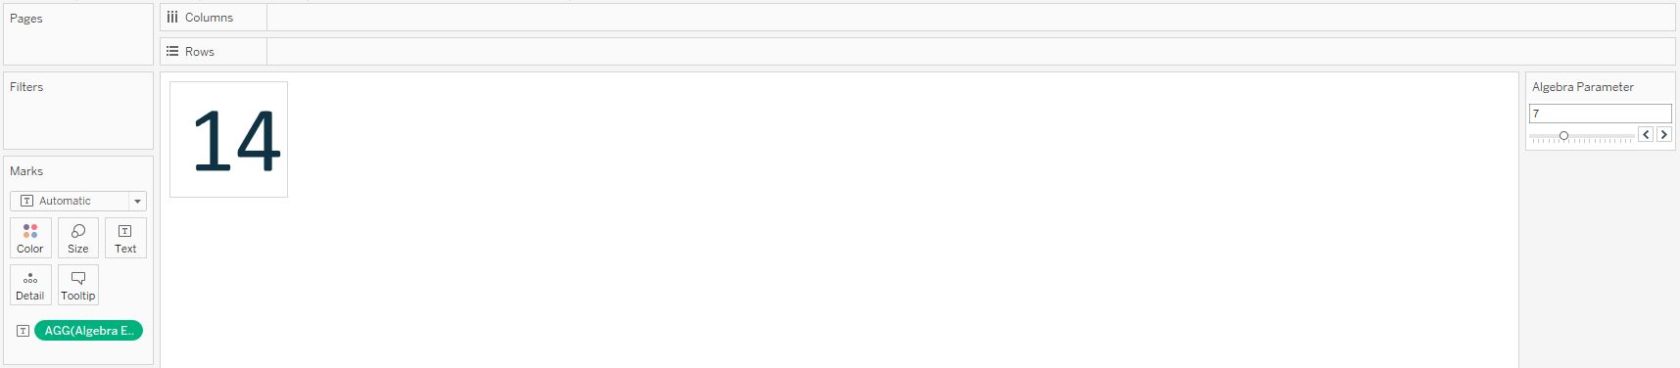
In this example, the end user has chosen the number 7, which powered the underlying calculation of 2*7, to produce the answer of 14. Imagine all of the power that can be put into the hands of your end users through the use of parameters!
For just a few other possibilities, see the following posts:
- How to Compare Two Date Ranges on One Axis
- How to Change Date Aggregation Using Parameters
- How to Make a What-If Analysis Using Parameters
- How to Compare and Create Segments
- Allow Users to Choose Measures and Dimensions
Written By

Evolytics
This post is curated content from the Evolytics staff, bringing you the most interesting news in data and analysis from around the web. The Evolytics staff has proven experience and expertise in analytics strategy, tagging implementation, data engineering, and data visualization.