In the last post, we shared how to create symbol maps in Tableau with custom Mapbox maps, and how mapping in Tableau leverages schemas that you are familiar with to help you rapidly decode latitude and longitude pairs.
Maps in Tableau can be thought of as scatterplots, but the background image of a map helps you orient yourself almost instantly with the different geographic territories being displayed.
Filled maps in Tableau are similar to symbol maps, but they include many more data points. While a symbol map draws a symbol at the intersection of each latitude and longitude pair, filled maps draw a polygon around the entire border.
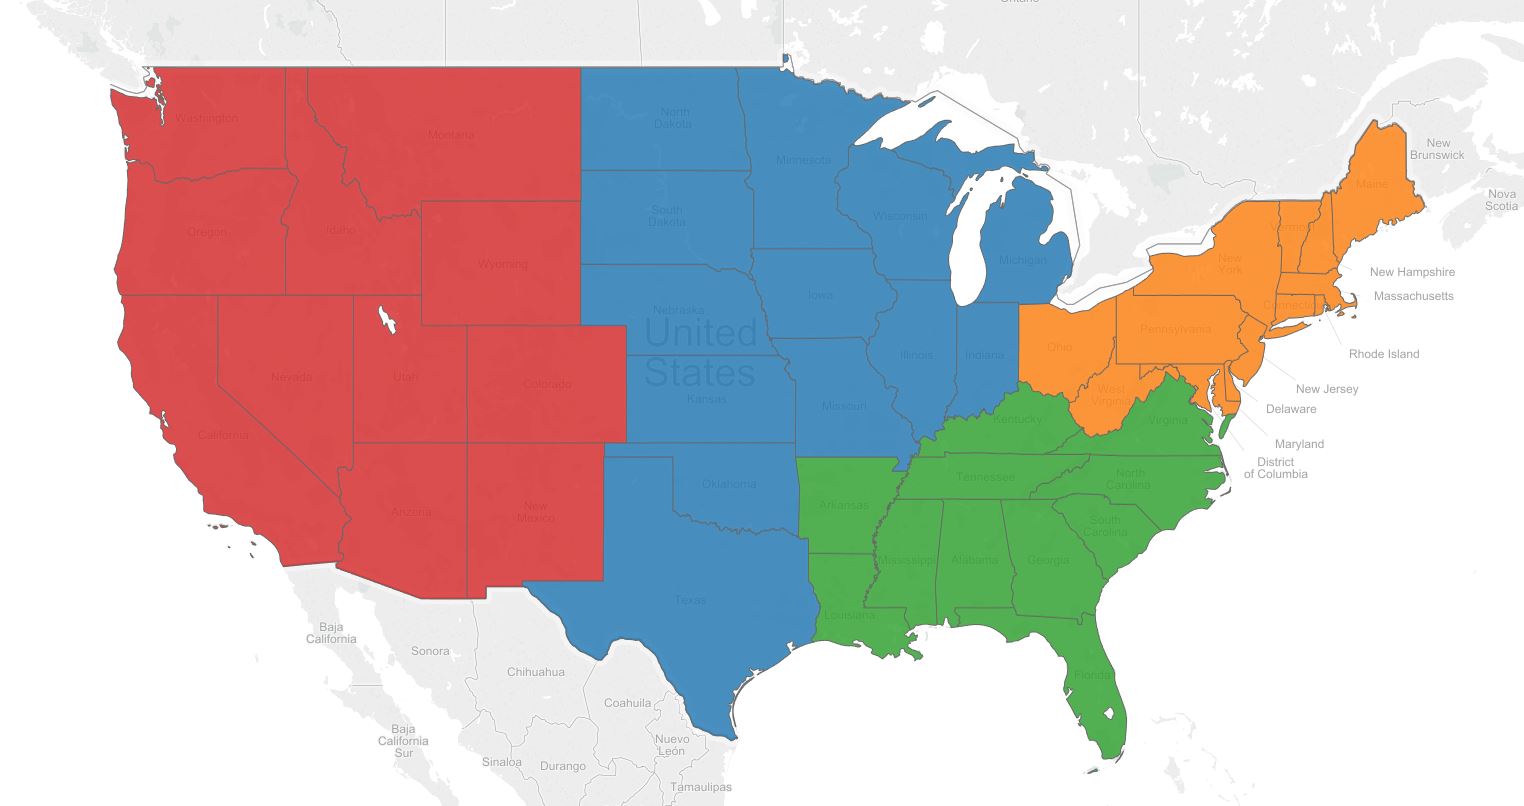
Here’s one example of a filled map colored by region in Tableau:
How to Make Filled Maps in Tableau
Filled maps are one of the easier chart types to create in Tableau using Show Me.
To do so, simply click a geographic dimension (identified by a globe icon) from the Dimensions Shelf and choose ‘filled maps’ under Show Me.
That being said, we prefer to create chart types manually, especially when we are learning. By creating the charts without relying on Show Me, it helps us understand what Tableau is doing behind the scenes to generate each chart type.
To create a filled map manually, we will double-click on the geographic dimension for State in the Sales – Superstore data set that comes with Tableau.
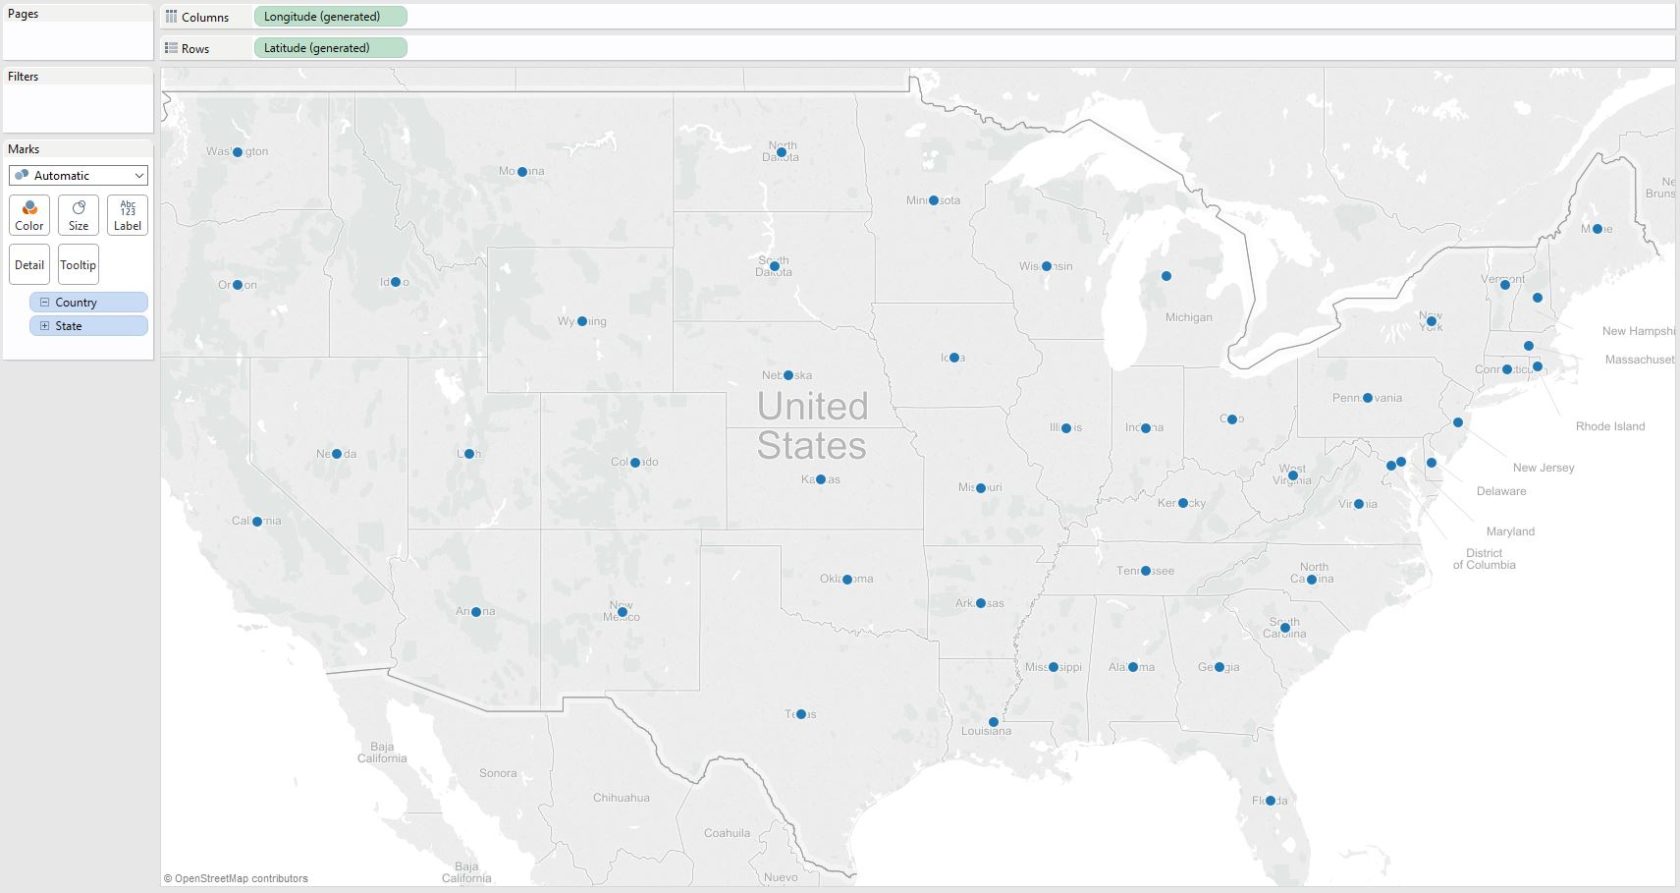
By default, Tableau generates a symbol map, placing a circle at the intersection of Longitude and Latitude for each state. In keeping with the “looking under the hood” theme of not relying on Show Me, take a look at the location of each dimension and measure.
First, Longitude is on the Columns Shelf, which can also be thought of as the X-axis.
Conversely, Latitude is on the Rows Shelf, or the Y-axis.
On the Marks Shelf, we can see that State is the most granular level of detail in the view. Even without seeing the map in the view, we should be able to guess what Tableau will display just by seeing the geographic fields on the Columns Shelf and Rows Shelf, the level of detail on the Marks Shelf, and the mark type of ‘Automatic’ (which is ‘Circle’ by default).
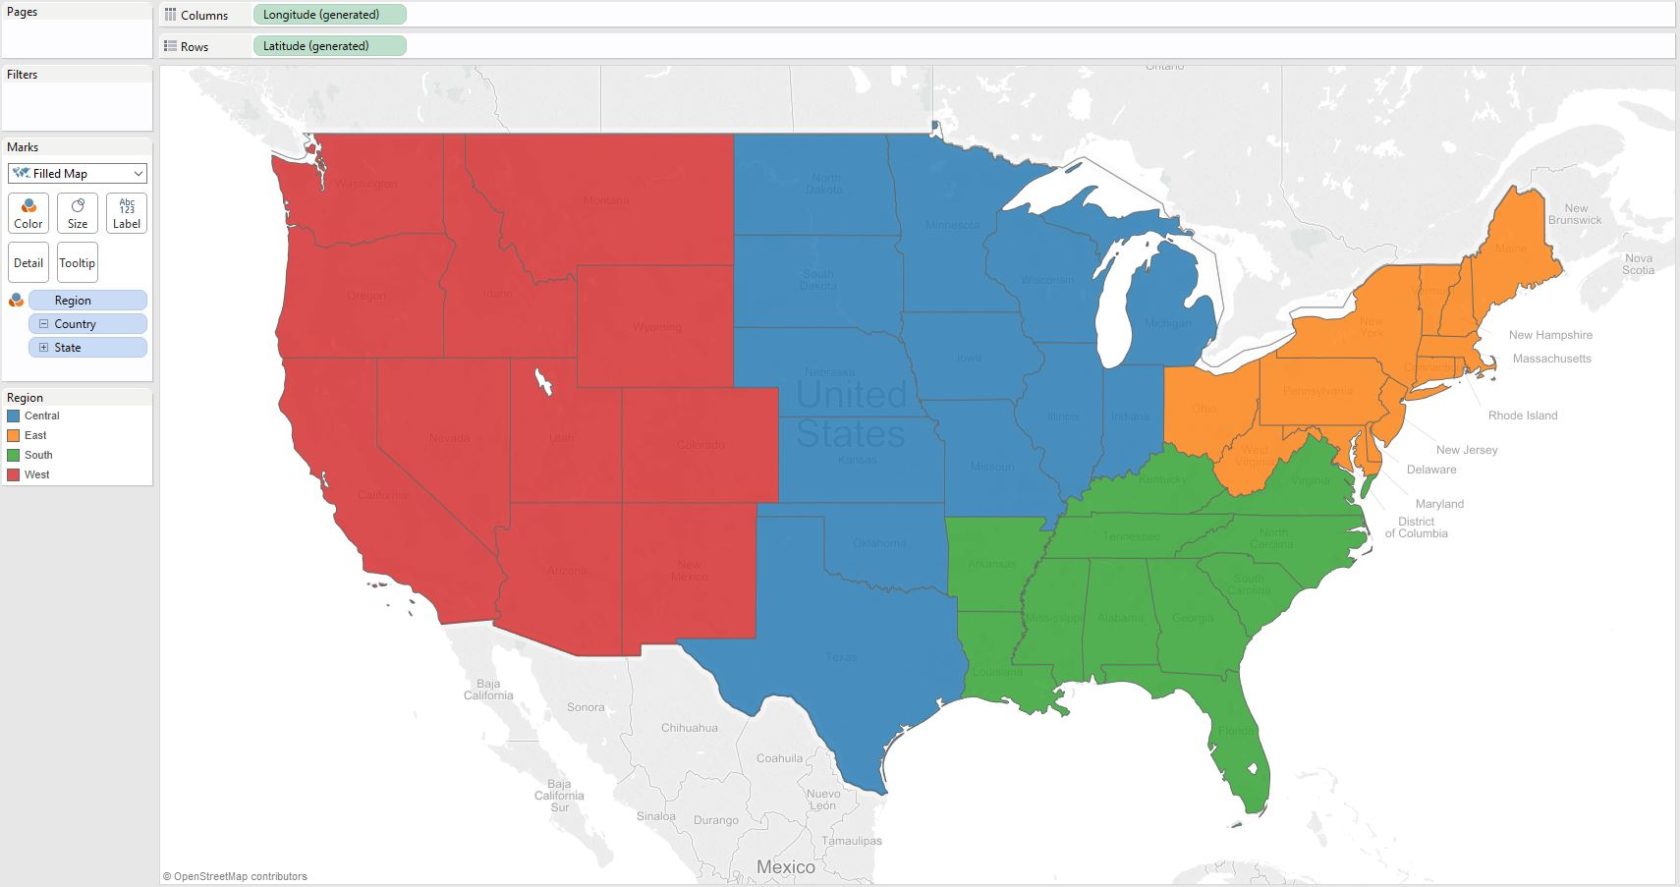
In order to change this from a symbol map to a filled map, change the mark type from ‘Automatic’ to ‘Filled Map’. By selecting this special mark type in Tableau, you will see that the single circles on each state have been converted to nice, smooth polygons that trace the entire border of each state.
From here, you can encode the filled map by color by placing a field on the Color Marks Card.
Perhaps you want to color the territories by a measure such as Sales or Profit.
You can also color the marks by a dimension, as is the case in this example, where the states are colored by the Region dimension.
The map view ends up looking like this:
Written By

Evolytics
This post is curated content from the Evolytics staff, bringing you the most interesting news in data and analysis from around the web. The Evolytics staff has proven experience and expertise in analytics strategy, tagging implementation, data engineering, and data visualization.